Diy performed on a honda :
The tools needed :
jackstands
adjustable jack
socket set, wrenches, breaker bar, extensions, axle nut socket
long pry bar
tourque wrench
hammer
(swivel sockets help big time)
one of more of your freinds
first you want to get the car as high in the air as possible for where you are working, we had it about 2 foot off the ground and it was fine.
for the next step you will need to remove the axles from the trans, to do this take off the front wheels. Once they are off, remove the cotter pin from the lower ball joint on hub, the nut is a 15mm, once that is removed hit the side of the joint with a hammer until it seperates. before you remove the shafts, drain the trans fluid, there is a plug on the side of the trans
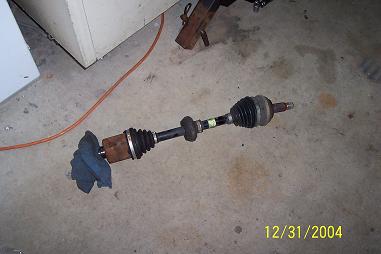
next, remove the axle nut and pull the rotor and hub away from the axle. pry the axle out of the trans with the pry bar, remove the axles completely.


next, remove whatever is in the way of seeing your trans, for example, stock air box, cold air intake, or in my case the charge pipe from the intercooler.

 | This image has been resized. Click this bar to view the full image. The original image is sized 732x488. |

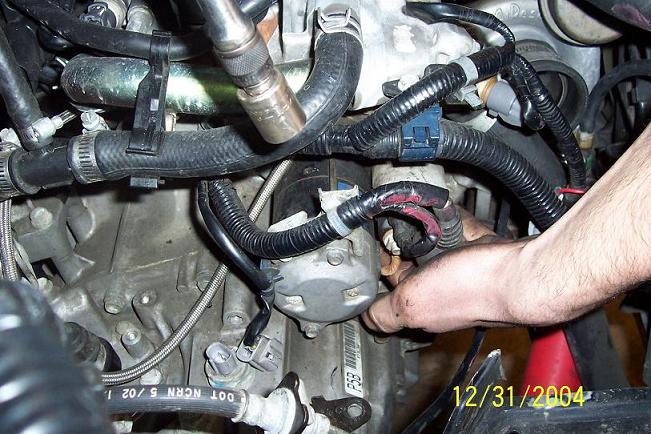
next you want to remove the starter, there are 2 bolts holding it in.

| This image has been resized. Click this bar to view the full image. The original image is sized 651x434. |

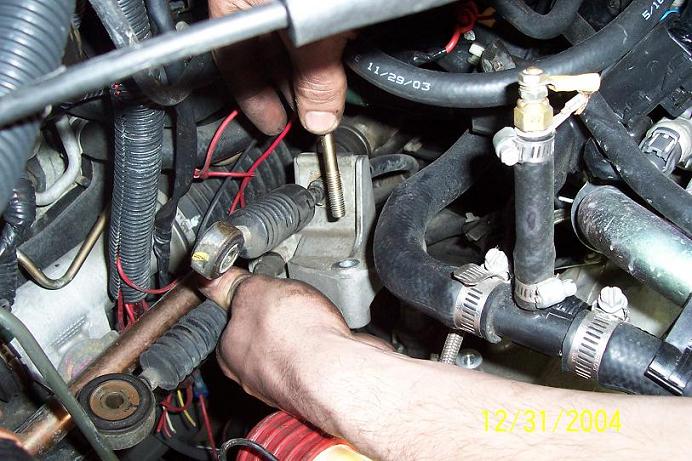
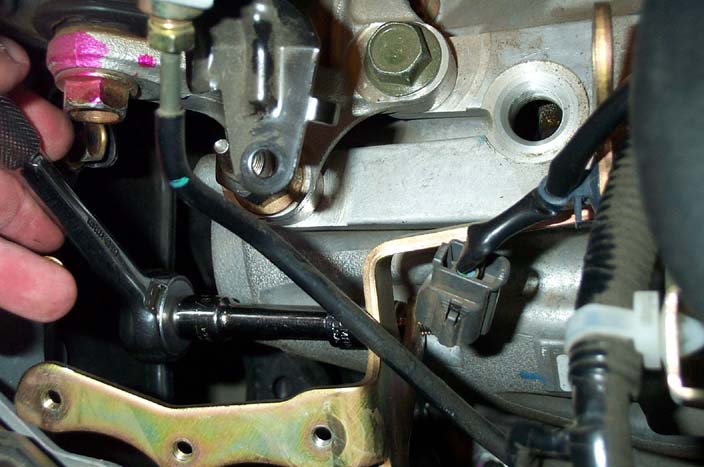
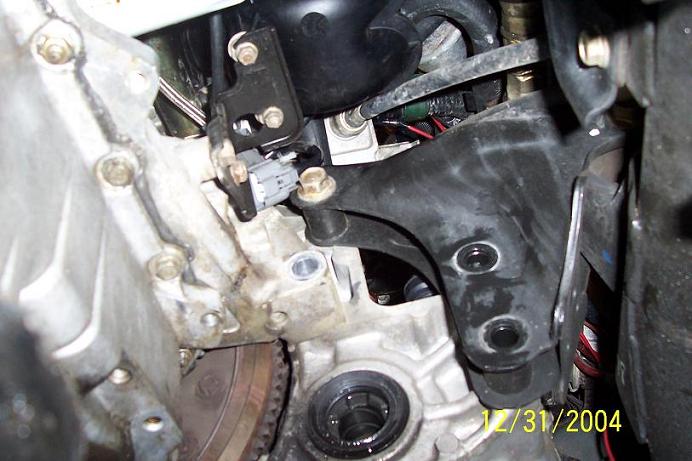
next, you have to remove the linkage off the top of the trans. there is a bracket bolted to the trans by 3 bolts, remove these 3 bolts, then remove the pins holding to 2 linkages to the trans. after the pins are removed, pop the linkage off and set it to the side. while doing this, you will also have to remove a sensor in the back of the trans behind this linkage.
| This image has been resized. Click this bar to view the full image. The original image is sized 692x461. |
| This image has been resized. Click this bar to view the full image. The original image is sized 659x440. |
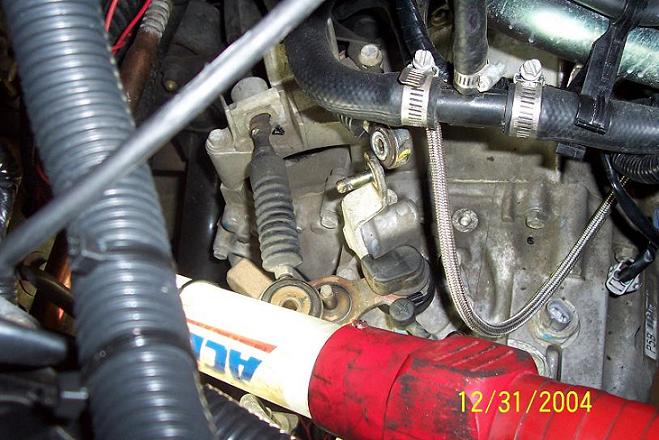
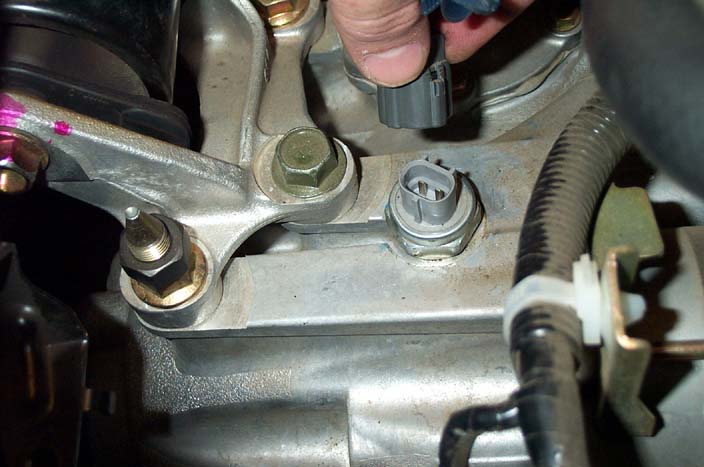
while on the top of the trans, remove the reverse sensor and braket for the hydraulic line.
| This image has been resized. Click this bar to view the full image. The original image is sized 704x467. |
| This image has been resized. Click this bar to view the full image. The original image is sized 704x467. |
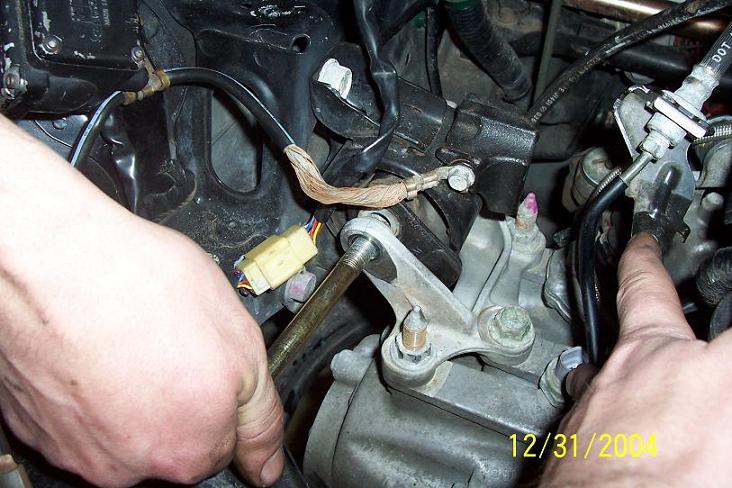
now comes the fun part, your going to have to remove both the front and back motor mount, and trans mounts. this will allow you to let the motor down a little to slip the trans in and out of the motor, and it will stay in the engine bay throughout the whole install, also it will allow you to move the trans as far away from the motor as possible without droping the subframe and removing everything. you want to have a jack under the motor on the oil pan, make sure you put a piece of wood between the jack and motor. hese is what the mounts look like:
trans mount:
| This image has been resized. Click this bar to view the full image. The original image is sized 732x488. |
front mount:
| This image has been resized. Click this bar to view the full image. The original image is sized 692x461. |

| This image has been resized. Click this bar to view the full image. The original image is sized 732x488. |

rear mount:
| This image has been resized. Click this bar to view the full image. The original image is sized 692x461. |
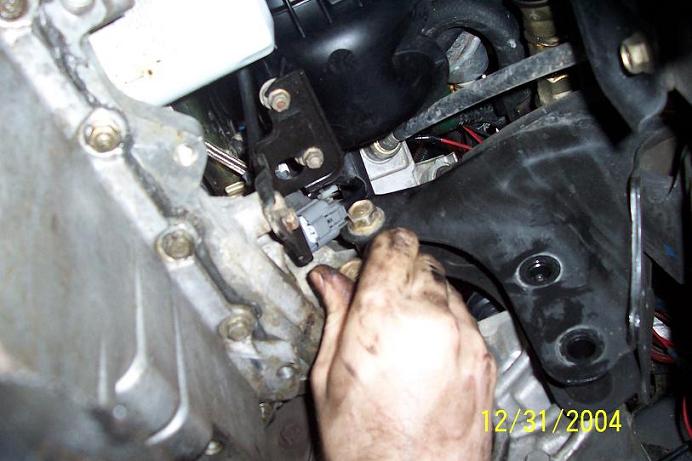
| This image has been resized. Click this bar to view the full image. The original image is sized 692x461. |
once these mounts are disasembled the motor should be free to move
next come the bell housing bolts on the trans, remove all of these
| This image has been resized. Click this bar to view the full image. The original image is sized 692x461. |

before you go to move the trans, remove the rest of the trans mount that is bolted to the trans, it will give you more room to move the trans
you will also have to remove the hydraulics from the front side of the trans. it is a rubber boot with a line running into it. remove the 2 bolts on top holding the bracket on, then pull it away from the trans.
now pull the trans away from the motor and move it as far to the left as possible
| This image has been resized. Click this bar to view the full image. The original image is sized 692x461. |

when the trans is disengaged from the motor, you will need to remove the shift fork and release bearing, and install the new one. do this by pulling the fork out from the inside. the new bearing should slide right in and you can reinstall the fork, make sure it is seated all the way down when you put it back in.
| This image has been resized. Click this bar to view the full image. The original image is sized 692x461. |

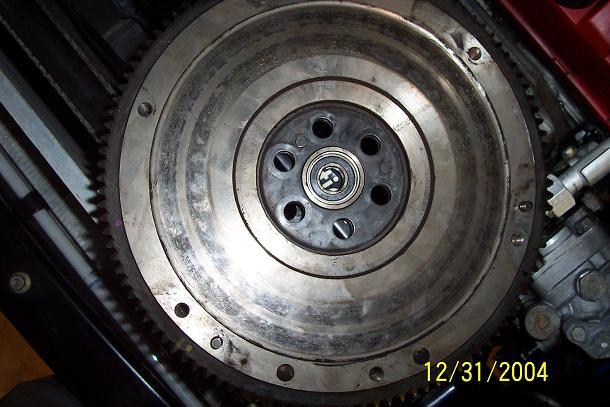
now there should be enough room to get to the bolts on the pressure plate and flywheel. have your freind hold the pry bar on the teeth of the flywheel while you break loose the bolts on the clutch and flywheel. rotate the flywheel to have easy access to all the bolts. its good to have another freind hold the trans back while you are removing the clutch.
when the flywheel comes out, either take it to a shop to have it refinished of buy a new one. pep boys does it for $31.00. this is a very important step, do not skip it.
| This image has been resized. Click this bar to view the full image. The original image is sized 692x461. |


now that your flywheel has a new surface, its time to put everything back together. your clutch kit should also come with a small bearing, this is the bearing in your flywheel, whoever resurfaced the flywheel would have had to remove this bearing. anyway, pop the new bearing in the center of the flywheel and make sure it is seated fully.
next bolt the flywheel up using the same method you used to take it off. we tourqued my flywheel to 80 ftlbs because we did not have the honda bible. 80 for the flywheel and 40 for the pressure plate is the usual.
now using the clutch allignment tool, line up the pressure plate and the clutch disk to the flywheel and bolt the whole assembly up. is is very important you use the alligment tool to line the splines up, or the shaft of the trans will not slide in the motor.
| This image has been resized. Click this bar to view the full image. The original image is sized 692x461. |

| This image has been resized. Click this bar to view the full image. The original image is sized 692x461. |

| This image has been resized. Click this bar to view the full image. The original image is sized 692x461. |

| This image has been resized. Click this bar to view the full image. The original image is sized 692x461. |

once everything is bolted up, remove the allignment tool. you are now ready to slide the trans shaft into the motor. make sure everything is clear and get one guy under the trans, one on top, and proceed to put it back together. it is important that the trans alligns by its self, dont allign the trans by running the bell housing bolts in. if the trans does not slide together, there is usually a problem. once everyting is in place, tightent the bell houseing bolts.
now that the trans and motor are reassembled, proceed to put everything back in reverse order you took it off:
hydraulic linkage on front of trans to shift fork and rubber boot (2 bolts)
front, rear, and trans mounts
linkage on back of the trans (3 bolts)
2 sensors on trans, one in back, one on top.
reinstall the braket on top of trans for hydraulic line.
reinstall starter (2 bolts)
reinstall CV shafts and reconnect lower ball joints, and axle nut
(make sure you seat the CVs into the trans, you will hear it pop in, you should not be able to pull the CVs out once they are snapped in)
reinstall wheels
reinstall air box, CAI, or charge pipe

lastly you will need to add fluid to the trans. the last page of your owners manual states the following:
use honda manual trans fluid or SAE 10w-30 as a replacement
trans and transfer case capacity is about 1.6 US quarts
(you will need to pump the oil into the trans using a bottle pump)
reinstall the drain plug.
let your car down and start it up to make sure everything is normal.


